Showing posts with label Sailing. Show all posts

Friday, 3 June 2016

A Mast For "Albion"

Filming four tons of Columbian Pine being laminated and fashioned into a mast for the Wherry "Albion" has been a fascinating project.  "Albion's" previous mast was manufactured in 2002 so it is highly unlikely I will ever film a similar event.

Columbian Pine, grown in Scotland, was selected for the mast and milled by Summerscales Ltd of Grimsby.  At the mill the timber was cut into three inch thick planks and shipped to Eastwood Whelpton's yard at Upton, Norfolk in 2012.  Here the timber was left to dry and season in an open ended shed until September 2015.
Photo courtesy Roger Watts NWT.
Laminating the timber gives added strength and flexibility to the finished mast.  In the old days the boat- builder, or carpenter, would go to a plantation and select a suitable "Pitch Pine".  From it they would fashion the mast in one piece.  It was not uncommon for these old masts to break under stress. 
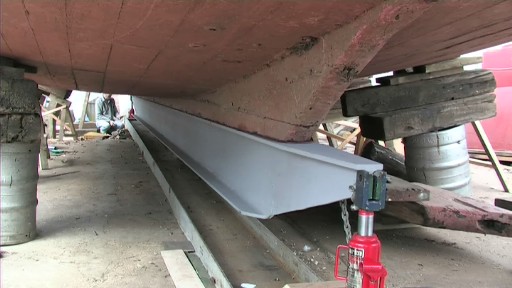
At Upton the roof of the shed that housed the overhead hoists had been been reinforced with upright timbers in order to support the fifty feet of bulk timber with an estimated weight of four tons.  

Timber batons were fitted between each length of planking to allow a generous coating of resin glue to be applied.   A team of four boat builders armed with lamb's wool rollers covered the upper and lower surfaces of each and every plank, under the watchful eye of Maynard Watson..

Photo courtesy Ian Scowen NWT

When every inch of the timber had been treated with resin glue each layer of laminate was raised with the hoist, allowing the spacing batons to be removed with the use of crowbars. The planks were lowered and clamped when all the spacers had been discarded.

Photo courtesy Ian Scowen NWT

Twenty six ratchet, tension straps were deployed along the length of the mast and tightened to within an inch of their lives.  To attain maximum tension the boat builders worked in pairs straining every sinew until their knuckles turned white and the resin glue oozed from between the planks.


Photo courtesy Ian Scowen NWT

When all the tension straps were firmly in place metal clamps were used to align the planks vertically while the resin was still malleable. The structure was left over a complete weekend to allow the resin glue to set and complete the first phase of the project.
Photo courtesy Ian Scowen NWT

After a few days the resin glue had cured sufficiently to allow the process to continue. The next phase of the  project was to square the timber structure into four equally flat sides. Using hand held circular saws, a series of cross cuts were made every two or three inches along the entire length of the mast.  These cuts were removed with hammer and chisel and finally planed smooth. The floor of the shed shuddered with a resounding thud each time the mast was turned to present a different face. 
 
Photo courtesy Ian Scowen NWT

When the mast had been squared attention was turned to the peak. A chain saw was used to shape the top of the mast after establishing the diameter and angle of taper.  The resin had set as hard as steel and the cutting blades of the chain saw quickly lost there edge.

Photo courtesy Ian Scowen NWT
Sawdust hung in the air as the whine of Electric planes echoed off the walls around the shed. After ten days the mast was gradually beginning to take shape.

Photo courtesy Ian Scowen NWT

The chainsaw was used to make a third and fourth angled cut to the peak of the mast. After several hours of planing the shape and the symmetry of the mast began to emerge.

Photo courtesy Ian Scowen NWT

The next phase of the project was to transform the four sides into eight sides forming an octagon. These eight sides would eventually be rounded off to form the finished mast. To square the timber the diameter of the mast had already been marked with a compass on each of the four sides. Using these same indicators a sliding bevel created cutting lines that would guide the saws to form the octagon.

Photo courtesy Ian Scowen NWT

The mast was hoisted and wedged at an angle to allow the chain saw to cut the bevel along the length of the mast. The foot retained four sides where the counter weight would be fitted.

Photo courtesy Ian Scowen NWT

The foot of the mast was flared to form a hip and then smoothed with an abrasive wheel.  Comparing the modern electric tools with the hand tools of a hundred years ago one can only marvel at the skill and energy required by those old time boat builders. 

Photo courtesy Ian Scowen NWT

The mast had to be turned and wedged in order to cut each of the four bevels which in their turn were planed smooth.  For several hours the plane followed the chainsaw along each bevel until the mast was a perfect octagon.

Photo courtesy Ian Scowen NWT

The whole structure was now somewhat slimmer and lighter than three weeks earlier and looking much more like a mast.  Although good progress was being maintained there was a still a great deal of precision work to be done before the mast was complete.

Photo courtesy Ian Scowen NWT

The body of the mast was now octagon shaped with the foot flared into a square. 

Photo courtesy Ian Scowen NWT
At the peak of the mast a step was formed for the crane iron.

Photo courtesy Ian Scowen NWT
The next task was to cut the Herring hole into the mast head.

Photo courtesy Ian Scowen NWT
All the fittings had been carefully removed from the old mast ready to be transferred to the one in production.  The crane iron was the first piece of hardware to be fitted.

Photo courtesy Ian Scowen NWT

The the main body of the mast was carefully rounded off.

Photo courtesy Ian Scowen NWT

At the foot of the mast the trunnion was was fitted and the counter weight prepared for mounting to the heel. The bottom of the mast was shaped to replicate the profile of the counter weight.

Photo courtesy Ian Scowen NWT

The extra long retaining bolts passed right through the body of counter weight and tightened. Although there was still work to be done the mast was all but ready.

Photo courtesy Ian Scowen NWT

Autumn had arrived and winter was fast approaching when the mast was removed from the shed and put into storage until the spring.  On March 30th 2016 "Albion" arrived at Upton and the mast was loaded.  A series of checks and function tests were carried out before "Albion" left with her new mast.


Wednesday, 11 November 2015

No Time To Blog.

What happened to summer?
I can remember the Easter holiday quite clearly that is when I planted my potatoes. Elated by the thought that spring had arrived and the whole English summer stretched out before me.
 Next thing I know it is October and our British winter is beckoning.
There is nothing wrong with winter for it brings - fantastic brittle light -   sunlight on frost covered trees and winter visitors on the wing.   This is all very well but what of my missing summer.  For the most part my time was devoted to the North Walsham and Dilham canal and "Hathor's" restoration programme.  Both these major projects kept me occupied for three or four days most weeks.

Springtime on the canal - Brrrr.


Hathor's restoration took precedence over all the other current film projects as the June deadline loomed.  The closing stages, the work became so intense there were occasions when I put the camera down and helped out with some of the more unskilled tasks.  There are small parts of  "Hathor's" varnished interior that allows me to puff out my little chest and proudly say "I did that bit."

Hathor was on the slipway for eight months while her hull was restored then a further ten months in the wet shed for interior renovation.
All things considered the double DVD set  covers the wherry's restoration fairly comprehensively.
From "Hauling out", steaming planks, constructing the new rudder and restoring her interior cabins.
The production opens with a brief history of the vessel's design and ends with the re-launch and blessing at How Hill, "Hathor's" spiritual home. 

Although I am reasonably satisfied with the final result I was quite relieved when the project was completed.  Although probably not as relieved as the staff at Wherry Yacht Charter who had spent two years with my camera in their faces.


Repairing "Hathor's" Hull
The DVDs are now on sale, they can be purchased in Norwich from the City Bookshop, in Davey Place.   Or via http://bigskyuk.weebly.com/dvds-for-sale.html       All profits will go toward maintaining "Hathor."


Friday, 5 December 2014

A Busy Ol' Summer.


With frosty mornings and icy winds to look forward to this seems a good time to look back over the last six months.  As far as summer's go this year has been one to remember.
It seemed to stretch endlessly into infinity,  reminiscent of my school holidays from long ago, when those precious school-free weeks ran out long before those wonderful summer days.

If I ever had a busier summer with a camera than this one I really don't remember it, and with seven projects in progress the cameras have been in constant use almost every day since early spring.  But if there is a better way to spend my time I can't imagine what it is.

Hathor's Restoration.
One of my regular weekly visits is the Wherry Yacht Charter Charitable Trust's yard at Wroxham.  Here the pleasure wherry "Hathor" has been under-going major restoration.

"Hathor" was winched onto the slipway over twelve months ago.
On February 19th, with her hull fully restored, she was re-floated and work began immediately on her topside and interior. First stage was to repair the plankways and cabin sides.  Then her decks were lined with plywood and covered with hard wearing lino.  Work has recently begun refurbishing the cabins and saloon.

Each stage of "Hathor's" restoration has, and is being recorded.  As the summer finally faded away this grand old lady was beginning to look her best once again.
Lining "Hathors" foredeck with plywood.

Fitting the Hawk benches.
"Sam" enthusiastically watches proceedings..

The  North Walsham and Dilham Canal.
On the North Walsham and Dilham Canal the restoration continues apace.  The banks of the dry section between Spa Common and Royston Bridge are well on the way to being reconstructed.  This is due to the extended dry spell from June to August which allowed a fleet of tipper trucks  to haul in tons of high grade subsoil.  Day after day they emerged through the dust creating some wonderful shots for the camera.  On the North side of Royston Bridge the progress has been equally impressive as the reconstruction heads unerringly toward Swafield.

Tippers bring in high grade subsoil.
Trucks emerge through the dust
A section of restored banking.
In late summer, with the help of a friend using his "Phantom" drone, with a GoPro camera on board, we were able to shoot some stunning arial footage of the reconstructed banks.

A magnificent distraction on the canal was the brood of Swans that hatched near Spa Common.   They have been high on the filming agenda on my regular, weekly visits to the canal. We have a record of the day they hatched to the present when they are now almost full grown.
They were the subject of an earlier blog.  If you would like to see the brood click on the links below.

http://bigskyproductions-jonno.blogspot.co.uk/
https://www.youtube.com/watch?v=SczVJ2UJf1Y


On September 26th as the summer was drawing to a close,  Doug Hamilton Cox, a retired Royal Engineer, walked the canal from Swafield to Tonnage Bridge.  We filmed the event which is intended to raise funds for the "Help For Heroes" charity.  Doug plans to walk every canal in the UK and raise £100,000.00. 
"Help for Heroes" Canal walk at Swafield lock.


Mist On The Marsh.
My labour of love continues to move toward completion, albeit very slowly.  All the documentary sequences are complete and most of the dramatised folklore is safely " in the can".   My undying appreciation for the cast, who with unswerving loyalty, have stuck with me and the project through some very trying times.  An extra special effort to complete this epic is scheduled for early 2015.
A clip from "Mist On The Marsh".


M&GN Dray.
While all this was going on, the M&GN  horse drawn dray was undergoing overhaul which I filmed whenever possible.  The film started at Banningham, where the hundred year old cart was renovated.
Dray off to Weyborne works.
This included the metal tyres being heated and fitted to the wheels.  From there the dray was taken to the sheds at Weybourne where the overhaul was completed.  Finally the dray was filmed arriving  at Holt station drawn by a magnificent shire horse.
Dray in the carpenters workshop.

Fitting the metal tyres.
The Dray arriving at Holt station.


Slipping "Albion"
On October 9th, in the dying weeks of our wonderful Indian summer "Albion" was being hauled out at Oulton Broad.  We arrived at Excelsior's yard to record the wherry being winched onto the slipway.
A brisk south-westerly rippled across Lake Lothing as "Albion" was secured to the cradle and hauled out of the water.
"Albion" almost out of the water.

Secured in the cradle.

On November 24th "Albion" was re-floated after her routine maintenance was completed.  Once again we made our way to Oulton Broad in time for "High water".  The wherry was smoothly lowered down the tracks and into the water.  With the tender standing by, the bilges were checked for leaks before we set off for the lock.  The traffic was stopped as "Albion"  slipped under the road bridge and into Mutford lock.  The summer was finally behind us on this shoot, but even at this late date the sun followed us into the yacht station to round the year off nicely.
The skipper checking tide times.
The tender standing by.

Stopping the traffic.

Inside Mutford Lock.

I hope the above demonstrates why the blogs have been few and far between in recent weeks.  We will try harder in 2015.
Merry Christmas  and a Happy New Year!

Jonno.

Monday, 29 July 2013

Boats Return To North Walsham and Dilham.

"Never thought I would ever see that again." stated a visitor to the North Walsham and Dilham canal open day as he watched a little sailing dinghy tack in front of Ebridge mill.   

The event was organised by the North Walsham and Dilham Canal Trust on Sunday July 27th and 28th 2013.  Giving an insight into the possibilities this priceless slice of Norfolk heritage has to offer.

The little wooden sailing dinghy reminiscent of the "Swallows and Amazons" era, created a view of a peaceful bygone age, caught in the ripples of the mill pool.

"Swallows and Amazons"

Just before mid-day the "Hoi Larntan" arrived and was launched from the canal bank.  "Hoi Larntan" is a skiff,  built in Thurning near Wood Dalling.


"Hoi Larntan"
She was launched at Blakeney in May this year in time for the Skiff World Championships in Ullapool.  The Coastal Rowing Association brought the skiff for a training session in the still waters of of the canal at Ebridge.

Skiff and Dinghy at Ebridge


"Hoi Larntan" is Norfolk dialect to describe a really good boat or skipper - it was also used as a derogatory term for someone who was too big for their boots.  

Both these boats can be seen sailing at Ebridge from the link below.

http://www.youtube.com/watch?v=gnbcmT0nzPE

Visit the North Walsham and Dilham Canal Trust new site  http://nwdct.org/index.html

Learn more about the "Hoi Larntan"    http://crablakeney.wordpress.com/

Wednesday, 1 May 2013

Steel Keel For A Wherry.


At the WYCCT yard at Wroxham on March 5th 2013 "White Moth" was hauled onto the slipway to have her wooden keel replaced with one of steel.  The wherry yacht "White Moth" was built by Ernest Collins in 1915.  King George V ruled Britain and the commonwealth and Henry Asquith was Prime minister.  Since then, to the best of my knowledge, "White Moth's" wooden keel has survived three monarchs, twenty seven Premierships and two World wars. 

When I was first told "White Moth" was having her wooden keel replaced with steel I thought it would make some interesting film footage - I never realised just how interesting this rare piece of engineering would be.  Having spent thirty years in the aviation industry I am no stranger to the many problems that can present themselves during heavy maintenance.  Remarkably this tricky project worked like clockwork from start to finish as each stage was meticulously planned and executed.

"White Moth's" keel clear of the slipway
The first step was to carefully raise and support "White Moth" clear of the slipway.
Then the old keel was surveyed and measured to ensure the steel replacement would retain the same amount of draught.  The old keel bolts were located and exposed by chiseling away sections of keel allowing the bolts to be cut through.

Profiles were fitted to the thirty two feet, or so, of keel on both port and starboard surfaces.  Then using the profiles as a pattern, shallow rebates were sawn along the entire length of the old keel with an electric saw, forming a guide for the serious surgery that was about to follow. 

The keel undergoing serious surgery

A two - man saw of an undetermined vintage was brought into the daylight for, what I imagine was,  the first time for many moons.  It was akin to the type of saws that were once used in saw pits.   Starting at the stern, the two-man saw began slicing its way efficiently through "White Moth's" ancient wooden keel.   The relentless effort needed to drive the saw through six inches of close grained Pitch Pine was nothing short of hard labour.  In spite of the frequent breaks required in the interests of rest and recuperation the keel was cut through surprisingly quickly.

One half of the two man saw in action

After cutting through the keel only a combination of clamps and wedges held it in place. As the clamps were slackened off  the wooden keel was dropped neatly alongside the slipway track, precisely where  intended.  It was difficult to estimate the exact weight of the old keel, but thirty odd feet of Pitch Pine in free fall could not underestimated.  With this in mind great care was taken to ensure that when the keel fell it did not disturb any of the props supporting "White Moth".  The plan worked perfectly. 

Wooden keel removed
While the old keel was being removed it's metal replacement was being fabricated in the "wet shed".  From there it was suspended by an ingenious arrangement of block and tackle and conveyed over the water.  Finely balanced and resting uneasily on a dinghy the new keel was eventually aligned with the slipway where it was submerged onto the slipway track.  

New keel crossing the water
Accompanied by the familiar sound of the ratchet rattling over the cogs on the winch "White Moth's"  new keel, shark-like in appearance, emerged from the water.  Gradually it was winched up the slipway into position beneath the Wherry yacht.

The new keel was winched up the slipway

The keel was temporarily jacked into position to allow the new keel bolts to be aligned with the fixing points inside the hull and the corresponding points on the keel. 

Keel bolts aligned
Nuts were welded to the upper surface of the metal keel and the keel bolts were turned into them with mole grips.   Everything was now aligned and ready for the keel to be raised and secured to the hull.

Nuts welded to the new keel.
A liberal application of Sikaflex marine sealant was applied to the keel's upper surface to form a watertight seal.  Finally the new keel was jacked into position and bolted down inside the hull.
Job done!

Job done!