Filming four tons of Columbian Pine being laminated and fashioned into a mast for the Wherry "Albion" has been a fascinating project. "Albion's" previous mast was manufactured in 2002 so it is highly unlikely I will ever film a similar event.
Columbian Pine, grown in Scotland, was selected for the mast and milled by Summerscales Ltd of Grimsby. At the mill the timber was cut into three inch thick planks and shipped to Eastwood Whelpton's yard at Upton, Norfolk in 2012. Here the timber was left to dry and season in an open ended shed until September 2015.
 |
| Photo courtesy Roger Watts NWT. |
Laminating the timber gives added strength and flexibility to the finished mast.
In the old days the boat- builder, or carpenter, would go to a plantation and select a
suitable "Pitch Pine". From it they would fashion the mast in one
piece. It was not uncommon for these old masts to break under stress.
At Upton the roof of the shed that housed the overhead hoists had been been reinforced with upright timbers in order to support the fifty feet of bulk timber with an estimated weight of four tons.
At Upton the roof of the shed that housed the overhead hoists had been been reinforced with upright timbers in order to support the fifty feet of bulk timber with an estimated weight of four tons.
Timber batons were fitted between each length of planking to allow a generous coating of resin glue to be applied. A team of four boat builders armed with lamb's wool rollers covered the upper and lower surfaces of each and every plank, under the watchful eye of Maynard Watson..
 |
| Photo courtesy Ian Scowen NWT |
When every inch of the timber had been treated with resin glue each layer of laminate was raised with the hoist, allowing the spacing batons to be removed with the use of crowbars. The planks were lowered and clamped when all the spacers had been discarded.
 |
| Photo courtesy Ian Scowen NWT |
Twenty six ratchet, tension straps were deployed along the length of the mast and tightened to within an inch of their lives. To attain maximum tension the boat builders worked in pairs straining every sinew until their knuckles turned white and the resin glue oozed from between the planks.
 |
| Photo courtesy Ian Scowen NWT |
When all the tension straps were firmly in place metal clamps were used to
align the planks vertically while the resin was still malleable. The structure was left over a complete weekend to allow the resin glue to set and complete the first phase of the project.
 |
| Photo courtesy Ian Scowen NWT |
After a few days the resin glue had cured sufficiently to allow the process to continue. The next phase of the project was to square the timber structure into four equally flat sides. Using hand held circular saws, a series of cross cuts were made every two or three inches along the entire length of the mast. These cuts were removed with hammer and chisel and finally planed smooth. The floor of the shed shuddered with a resounding thud each time the mast was turned to present a different face.
 |
| Photo courtesy Ian Scowen NWT |
When the mast had been squared attention was turned to the peak. A chain saw was used to shape the top of the mast after establishing the diameter and angle of taper. The resin had set as hard as steel and the cutting blades of the chain saw quickly lost there edge.
 |
| Photo courtesy Ian Scowen NWT |
Sawdust hung in the air as the whine of Electric planes echoed off the walls around the shed. After ten days the mast was gradually beginning to take shape.
 |
| Photo courtesy Ian Scowen NWT |
The chainsaw was used to make a third and fourth angled cut to the peak of the mast. After several hours of planing the shape and the symmetry of the mast began to emerge.
 |
| Photo courtesy Ian Scowen NWT |
The next phase of the project was to transform the four sides into eight sides forming an octagon. These eight sides would eventually be rounded off to form the finished mast. To square the timber the diameter of the mast had already been marked with a compass on each of the four sides. Using these same indicators a sliding bevel created cutting lines that would guide the saws to form the octagon.
 |
| Photo courtesy Ian Scowen NWT |
The mast was hoisted and wedged at an angle to allow the chain saw to cut the bevel along the length of the mast. The foot
retained four sides where the counter weight would be fitted.
 |
| Photo courtesy Ian Scowen NWT |
The foot of the mast was flared to form a hip and then smoothed with an abrasive wheel. Comparing the modern electric tools with the hand tools of a hundred years ago one can only marvel at the skill and energy required by those old time boat builders.
 |
| Photo courtesy Ian Scowen NWT |
The mast had to be turned and wedged in order to cut each of the four bevels which in their turn were planed smooth. For several hours the plane followed the chainsaw along each bevel until the mast was a perfect octagon.
 |
| Photo courtesy Ian Scowen NWT |
The whole structure was now somewhat slimmer and lighter than three weeks earlier and looking much more like a mast. Although good progress was being maintained there was a still a great deal of precision work to be done before the mast was complete.
 |
| Photo courtesy Ian Scowen NWT |
The body of the mast was now octagon shaped with the foot flared into a square.
 |
| Photo courtesy Ian Scowen NWT |
At the peak of the mast a step was formed for the crane iron.
 |
| Photo courtesy Ian Scowen NWT |
The next task was to cut the Herring hole into the mast head.
 |
| Photo courtesy Ian Scowen NWT |
All the fittings had been carefully removed from the old mast ready to be transferred to the one in production. The crane iron was the first piece of hardware to be fitted.
 |
| Photo courtesy Ian Scowen NWT |
The the main body of the mast was carefully rounded off.
 |
| Photo courtesy Ian Scowen NWT |
At the foot of the mast the trunnion was was fitted and the counter weight prepared for mounting to the heel. The bottom of the mast was shaped to replicate the profile of the counter weight.
 |
| Photo courtesy Ian Scowen NWT |
The extra long retaining bolts passed right through the body of counter weight and tightened. Although there was still work to be done the mast was all but ready.
 |
| Photo courtesy Ian Scowen NWT |
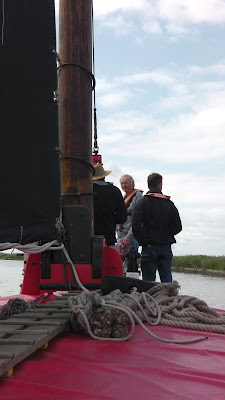
Autumn had arrived and winter was fast approaching when the mast was removed from the shed and put into storage until the spring. On March 30th 2016 "Albion" arrived at Upton and the mast was loaded. A series of checks and function tests were carried out before "Albion" left with her new mast.


